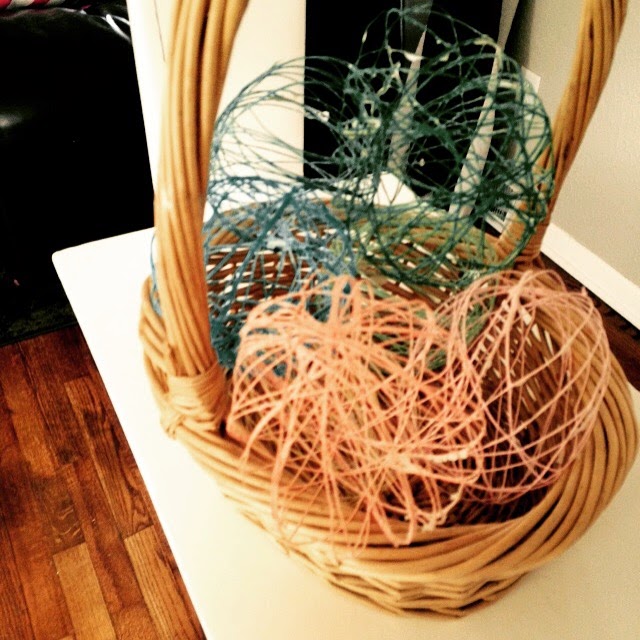
I am back after a long time away. I have been very busy and want to try my hand at blogging again. To start my first post I found this BEAUTIFUL egg wreath that I wanted to try the directions (and picture) I tried came from this blog right here http://www.wineandglue.com/2012/03/easter-egg-wreath.html I also used some directions from http://www.craftbyphoto.com/yarn-easter-eggs/.

Some of these tutorials called for Mod Podge the wreath directions called for 1/2 cup of flour and Sta-Flo liquid starch. I did not want to purchase something I would only be using once and I did not want to waste a bunch of Mod Podge since it is so expensive. I decided to go the old fashion route and make some old fashion glue 1/2 cup of flour and water until its the consistency of
paste. Here are the directions I tried to follow to make my own wreath.
1. Buy pretty pastel embroidery floss I used a combination of colors I already had and went and purchased more at Hobby Lobby. She said 20 colors I only used about 11.
2. Also purchase water balloons, I purchased a variety pack of balloons at Hobby Lobby and picked out the ones that were water balloon size. Here is the size I picked out.
3. Mix your flour and water mixture (or whatever you choose) into a bowl.
4. Blow up the number of balloons of your choosing I placed them on a large cookie sheet covered in a piece of waxed paper.
5. Place one thing of embroidery floss into your glue (unwrap it first and lay it gently in the bowl). This is the best tip I received! By doing this is prevents the floss from becoming one big knotted mess. Gently push it into the mixture so it is all covered.
6. Take one end of the floss (make sure you take your two fingers (thumb and pointer) and pull of the excess goop.
Now here is where I stopped taking pictures sorry!
7. Begin wrapping around the balloon and continue pulling off excess goop. Wrap until you have used all the floss for the roll.
8. Place on the cookie sheet and allow to dry. I let my dry overnight I just flipped them after a few hours so the other side could dry.
9. The next morning I gently pushed the balloon away from floss and used a pin to pop the balloon.
Now here is where it failed I also didn't get enough of the glue off and it stuck to floss:
I tried to create the wreath by setting the floss eggs around a round casserole dish. I threaded a piece of thick ribbon through each egg and then tried hot gluing the connecting edges of the eggs together.
For some reason the form of the wreath did not keep. So instead of fighting it I took apart the glued edges. and placed my eggs in a cute basket near the door. Overall they didn't turn out too bad and my husband even said they turned out well.


